High Quality, Low Budget: How to Pick Your DIY Tools
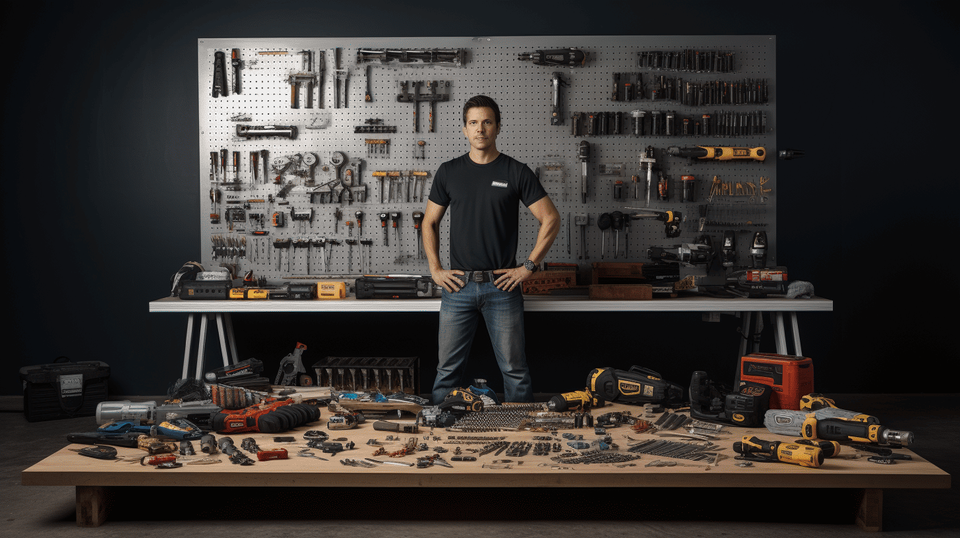
Imagine stepping into your DIY project, eager to pour in your creativity and hard work, only to find your tools breaking down in the middle of it all. Frustrating, right? That's the power of a tool in a DIY project— it can make or break your entire experience. 🛠💪 In this article, we delve into the world of tools from a DIYer's perspective, guiding you on how to choose high-quality tools without blowing your budget. Whether you're an experienced DIY enthusiast or someone who's just started their journey, this guide is sure to equip you with the knowledge to build, repair, or create with confidence—and enjoy doing it. After all, the right tools not only help us to perform better but also ensure safety while we are at it. So buck up, fellow DIY enthusiasts! Let's start building not just the project, but a toolkit that you'd be proud to own. 💼🔧🌟 Stick around and let's make your DIY project a great success!
Understanding Your Project Needs
Every successful project has one foundational factor: a clear understanding of the project's needs. Finding a solid ground to recognize your project’s demands could potentially decide between the achievement of success or the sinking into uncharted waters.
Here's how to better understand your project needs:
Identifying the Scope of the Project
Your project's scope defines the parameters within which you would operate and these act as guardrails for the project. Here's how to correctly identify the scope of your project:
- Objective: Start by defining the objective of the project. As the first stepping stone, it should be capable of communicating the desired output of the project.
- Resources: Make an outline of the resources you would need during the project's lifecycle.
- Constraints: Not every project runs on an open, unlimited field. You'll likely have a deadline and a budget. Defining these constraints early will ensure you don't end up going overboard.
- Tasks: Break down the project into smaller tasks or stages. It gives you a clearer picture of the journey ahead.👷♀️
Now, armed with a robust project scope, you're one step closer to understanding your project needs. But that's not all. Next up: the tools.
Listing Necessary Tools
Every craftsman knows that the right tools can make all the difference. Projects are no different. Here's a quick guide to help you identify the essential tools for your project:
- Project Management Software: Everyone on the team should be able to track their progress and collaborate effectively. A good project management software can bring that all together.
- Communication Tools: Good internal communication is vital for a smooth-running project. With the right communication tools, everyone stays on the same page.📚
- Task Tracking Tools: Keep track of the tasks assigned and their progress. It always maintains a sense of what’s under control and what needs more attention.
Remember, a tool is as good as its user. So, ensure you and your team are familiar with the tools you choose.
But, simply understanding your project needs isn't going to guarantee success.🎖 It breathes life into your project, however, setting the direction for planned progression, readying your tools, and most importantly, gearing up the team is a blend of these clues that helps you drive up the road to project success. As always, understanding is the key, and it's always in your hands.🔑
How To Choose Quality Tools Within Your Budget
Whether you're a do-it-yourself enthusiast or a determined professional, having quality tools is non-negotiable. Amazingly, buying top-tier tools doesn't necessarily mean breaking the bank. You just need to know how to shop smart and make the most of your budget. Here are some nifty tips to help you navigate this.
Determining Your Budget
Start by taking a realistic account of what you can afford. It's tempting to splurge on tool shopping, but it's crucial to avoid digging a financial hole you can't climb out from.
- Identify your income and expenses
- Set aside a fraction of your disposable income
- Factor in long-term tool maintenance and upgrades
Remember, the goal isn't to get the most expensive tools; it's to get the best tools you can afford💡!
Researching Tool Quality
The next step is to research extensively on the tool quality. High price tags aren't always synonymous with high quality. Some essential considerations include:
- Durability
- Efficiency
- Warranty
- Brand reputation
Also, reading reviews from other users could provide invaluable insights. As they say, "wisdom comes from learning from others' experiences" 🧐.
Looking for Deals or Discounts
Don't underestimate the power of good deals and discounts when budget-shopping for quality tools. Many retailers offer great discounts, especially around holidays or during clearance sales.
- Be sure to sign up for deal notifications from your favorite retailers.
- Checking out online marketplaces may also yield some interesting finds.
- You might even get lucky at a local yard sale!
Prioritizing Essential Tools
Lastly, prioritize! There's no need to buy every tool under the sun. Identify what you need most and start there.
- Consider what projects you'll be working on.
- Think about the tools you'll use the most.
- Remember that a good tool should help you work smarter, not harder.
When you thriftily prioritize, research, and shop at the right places, choosing quality tools within your budget becomes a doable task. Be patient, and before you know it, you'll have an arsenal of reliable tools without straining your wallet! 👏
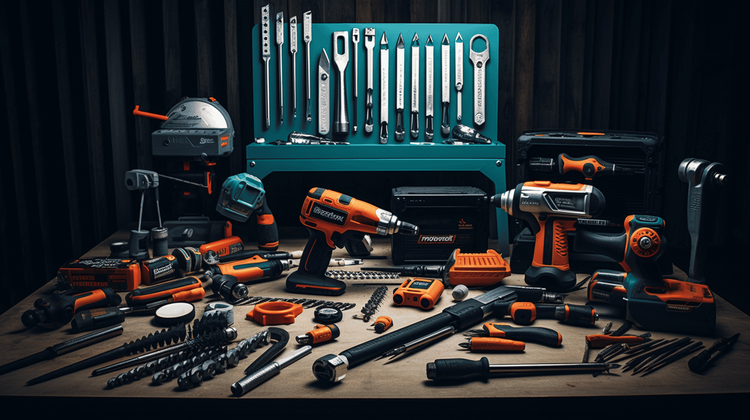
Distinguishing High Quality Tools
Materials and Construction
Whether you are a seasoned builder or a do-it-yourself hobbyist, the quality of your tools is key to achieving a successful project. Indeed, high-quality tools can make all the difference between a job well done and one fraught with challenges.
One essential aspect that separates superior quality tools from their inferior counterparts is the materials and construction used in making them. It's almost like building a house. When you construct it with the finest materials, it's more likely to withstand the test of time, isn't it?
Superior tools are typically made from sturdy materials. Take a hammer, for instance. A top-grade hammer's handle is usually crafted from strong hardwood or fiberglass, making it durable and comfortable to use. Meanwhile, the head should be of forged steel. In the same breath, it would be best if you had a screwdriver with hardened steel tips to prevent wear and tear.
Even the way these tools are assembled indicates their quality. For instance, the strongest hammers have handles and heads that are securely fitted, so they don't separate easily under heavy use. Isn't it elementary, my dear Watson? The principle—"The whole is only as strong as its poorest part"—is entirely valid here.
Comparatively, low-quality tools may be made from inexpensive, soft materials that wear out quickly. At face value, these may seem like a bargain, but the adage that "cheap is expensive" often proves true. Imperfect tool construction can also add to the subsequent risks of breakage, especially during strenuous tasks.
User Reviews and Feedback
Another treasure trove of information for determining high-quality tools is the user reviews and feedback sections. Want to simplify the tool selection process? This can be your best friend!
People who've already used the tool first-hand offer perspectives that marketing and product descriptions just can't match. Most of the time, they discuss durability, efficiency, and how well the tool meets their needs. A tool that consistently receives positive reviews and high ratings across multiple parameters may be a good option.
However, always remember to take reviews with a grain of salt 🧂. People have different expectations, and what may be high-quality for one person may be completely different for another!
Manufacturer's Reputation
Finally, when distinguishing high-quality tools, the manufacturer's reputation holds a place of prominence. When a company has a long track record of producing reliable and high-performing tools, you can expect nothing but superior products.
Reputable manufacturers also offer warranties, which are a clear indicator of their belief in their products' quality. Why would they guarantee a product that would cost them more in repairs or replacements, right?
All these points collectively contribute to distinguishing high-quality tools. Remember, cutting corners in selecting your equipment could lead to substandard work and even increase the risk of injuries. So, always opt for quality over cost, as it is a long-term investment that can pay off in the end. As always, the choice is yours: let your wallet guide you or let the quality of the work shine through you!
Safety Tips When Using DIY Tools
Do-it-Yourself (DIY) projects are a great way to fix things around the house or even unleash your latent creativity. However, it's important to respect your tools, understand their functions, and handle them with care to avoid serious injuries. This section will highlight some key safety tips when using DIY tools, keeping you safe and efficient.
Proper Tool Handling and Maintenance
Proper tool handling is the first step towards a safe DIY experience. Here are some basic rules you should follow:
- Understand each tool: Before you start any project, take some time to thoroughly understanding how each tool operates. This might involve reading instructions or watching tutorial videos.
- Use the right tool for the job: Avoid improvisations! A screwdriver is no substitute for a drill, and a knife should never replace a saw!
- Maintain and store your tools properly: Rusty, dirty, or damaged tools can pose a hazard. Clean your tools after use, store them in a cool and dry place, and keep them sharp. Also, consider using tool organizers for a clutter-free workspace.
Remember, a well-maintained tool is a safe tool!
Wearing Protective Gear
Ever heard the saying, 'Dress for the job you want?' When it comes to DIY, dress for the job you're doing! It's a non-negotiable that you should wear appropriate protective gear based on the tools and tasks at hand. Here's a quick checklist:
- Protective eyewear: Glasses will shield your eyes from flying debris and dust.
- Gloves: These will protect your hands from splinters, cuts, and burns.
- Hearing protection: If you're using noisy power tools, don't forget your earplugs!
Safety is not just a slogan; it's a way of life.
Ensuring a Safe Workspace
The final piece of the DIY safety puzzle lies in the workspace. Keep in mind the following tips to ensure a safe working environment:
- Clear clutter: A cluttered workspace can lead to slips and falls. Make sure you tidy up before and after your project.
- Keep kids and pets away: DIY tools aren't toys and can be extremely dangerous for children or pets.
- Proper lighting: You'd be surprised how much a well-lit workspace can reduce the risk of accidents.
To wrap things up, staying safe while doing DIY projects doesn't have to be a daunting task. By following these simple safety tips, you can ensure your projects run smoothly, and you stay intact to enjoy your end products. The secret to a successful DIY project, after all, isn’t just about a hammer and nails; it’s knowing how to work safely and smartly! 💡
Maximizing the Lifespan of Your Tools
When it comes to getting the most out of your tool collection, a little TLC can go a long way. Just like you take care of your car or your favorite pair of shoes, your tools need that same kind of attention. Not only does proper care prolong the lifespan of your tools, but it also boosts their performance. It's a worthwhile investment, as well-maintained tools are more likely to be reliable, efficient, and safe. Let's explore several pillars of tool maintenance: proper storage, regular cleaning, and timely repairs.
Proper Storage
The importance of proper storage for your tools cannot be overstated. Poor storage conditions can lead to a whole host of problems, including rust, dust accumulation, and physical damage.
With the right storage strategy, your tools can remain in peak condition for longer. Here's how:
- Keep your tools in a cool, dry place. Heat and moisture are the enemies of metal, and they can severely damage your tools over time.
- Organize your tools neatly. A cluttered tool shed is a hazard to your tools and you. Separate tools based on their size and purpose to prevent any accidental damage.
- Use tool hooks or a pegboard to hang tools. This prevents your tools from being piled on top of each other, reducing the risk of unnecessary wear and tear.
Regular Cleaning
Just like us, tools need a good scrub now and then. Cleaning removes unwanted elements such as dirt, oil, or grease that may interfere with the performance of your tools. Regular cleaning also gives you the chance to inspect your tools for any signs of damage.
Here are some quick steps to keep your tools squeaky clean:
- Avoid using corrosive cleaning agents. Stick to mild soap and warm water for a safe, gentle clean.
- Dry tools thoroughly after cleaning to prevent rusting.
- For power tools, use compressed air to remove sawdust and debris from hard-to-reach areas.
Timely Repairs
Problems with your tools? Fix them pronto! 🏃 Don't wait for minor issues to turn into major malfunctions. Performing timely repairs not only extends the lifespan of your tools but also ensures they function at their optimal level.
Here's how you can make timely repairs:
- Regularly inspect your tools for wear and tear.
- For minor fixes, consider do-it-yourself repairs. A quick online video tutorial can guide you through the process.
- For more complex issues, seek professional help. It might cost you a bit, but it will ensure your tools are fixed correctly and are safe to use.
Caring for your tools is about more than just maximizing their lifespan—it's about making the most out of your investment. Start incorporating these maintenance habits today, and watch your tools perform better and last longer. Remember, a well-maintained tool is a happy tool! 😀
Conclusion
Embarking on a DIY project is an exciting endeavor. It's all about finding what works for you, identifying the right tools for the job, and making smart, budget-friendly choices. This journey can seem intimidating, but with a sound understanding of your project needs and investing in high-quality, durable tools like the ones from Ultra Handy, it becomes a tremendously fulfilling experience.
Remember, the secret underlies in the details: deliberate on your budget, prioritize essential tools, scrutinize the quality, consider user-reviews, manufacture reputation, and lastly, don't forget to look for deals or discounts! Also, consider the longevity of your tools, follow the recommended maintenance practices and ensure you're safe while at it.
So why wait? It’s time to roll up your sleeves, get your Bit Holder Keychain at hand and immerse yourself in the gratifying world of DIY Projects. At Ultra Handy, we thrive in helping you succeed both in life and at work. Happy creating! 😊
Frequently Asked Questions
- What are some high-quality, low-budget DIY tool options?Some high-quality, low-budget DIY tool options include brands like Stanley, Craftsman, Black+Decker, and Ryobi. These brands offer a wide range of reliable and affordable tools for various DIY projects.
- How can I determine the quality of a DIY tool?To determine the quality of a DIY tool, you can consider factors such as brand reputation, customer reviews and ratings, warranty period, materials used in construction, and overall durability. It's also helpful to research and compare different models to find the best value for your budget.
- Are cheap DIY tools worth buying?While cheap DIY tools may be tempting due to their low cost, it's important to consider their quality and durability. Some cheap tools may not withstand heavy use or offer the same level of precision and performance as higher-end counterparts. It's often worth investing a bit more for better quality tools that will last longer.
- Where can I find affordable DIY tools?Affordable DIY tools can be found at various places such as online marketplaces like Amazon, home improvement stores like Home Depot or Lowe's, and even local pawn shops or thrift stores. Additionally, keep an eye out for sales, discounts, and clearance sections to get the best deals.
- What are some essential DIY tools for beginners?Some essential DIY tools for beginners include a hammer, screwdriver set, adjustable wrench, tape measure, utility knife, pliers, level, and a cordless drill. These basic tools can handle a wide range of DIY projects and are a good starting point for any toolkit.