The Ultimate DIY Guide: Building Your Essential Toolbox on a Budget

The rolling wheels of creativity can often be hindered by the unavailability of the right tools. Whether you're a craft enthusiast, a budding DIY-er, or a proud homeowner, having a well-equipped toolbox is an absolute necessity. But here's the common misconception–building a versatile toolbox means breaking your bank. Contrarily, compiling your essential DIY toolbox can be cost-effective, fulfilling, and quite fun!
This article will guide you through the path of building your DIY toolbox on a budget. It will not only dive into the economic benefits but also reveal some little-known money-saving tips. Next, it will provide an exhaustive list of tools ranging from basic to advanced, depending on your DIY proficiency level. Lastly, emphasizes the importance of toolbox organization and storage to ensure your tools' longevity and functionality. By the end, you'll be ready to roll up your sleeves and start building your ultimate toolbox!
Economic Advantage of Building Your DIY Toolbox
Taking up DIY tasks can be exciting and rewarding – but let's not forget the economic benefits that come alongside. Economizing your resources becomes much easier when you switch to a DIY mindset, starting with building your very own DIY toolbox. This finance-savvy approach can save you from unnecessary expenses, while enabling you to enjoy a sense of accomplishment over your carefully finished tasks. The cost of building a DIY toolbox can range from $950 to $1900, which may vary depending upon the quality of tools you pick. Interestingly, a business startup toolbox can range from as low as $2,000. Let's delve into the cost-related intricacies of owning a DIY toolbox, shall we?
Money-saving Tip
Spending hundreds or even thousands of dollars for simple household repairs sounds bothersome to many. That's where the DIY approach steps in! By keeping a well-equipped DIY toolbox, you can tackle basic repairs on your own, thus bypassing the need for professional help and, consequently, saving a chunk of money.
Cost Reshuffle
Although the initial expenditure for assembling your DIY toolbox can seem a bit high, think of it as a one-time investment. Remember that once it's done, your toolbox can serve you for years and savings will eventually outweigh the upfront cost. So rather than frequently dishing out sums for minor repairs, you just spend once and reap the perks for a good long time.
Estimating Costs
While estimating the costs, bear in mind that building a quality DIY toolbox is more about investing in vital tools that would last longer, as opposed to bombarding your box with lots of needless items. Select your tools with a focus on the common repairs or projects you’re likely to tackle. This way, the total expense is kept under check, while ensuring your toolbox is armed for most tasks at hand.
So, the economic advantage of having your own DIY toolbox is pretty obvious. It offers significant potential savings over time, keeping your hard-earned cash in your pocket where it belongs.
Essentials for a Basic DIY Toolbox
Having the right tools can turn a daunting DIY project into a manageable, even enjoyable, chore. But whether you're a seasoned DIY-er or just starting out, deciding what tools to put in your toolbox can be confusing. In a perfect world, we would all have a fully stocked workshop, but in reality, most of us have to make do with a few basics. Here, we're going to cut through the confusion and talk about six essentials that should form the backbone of any basic DIY toolbox.
Screwdriver Set
Nothing ruins a weekend furniture assembly like not having the right screwdriver. A comprehensive screwdriver set should be the foundation of your toolbox. Aim for a set that includes both flathead and Phillips-head varieties in various sizes. Screwdrivers are not just for driving screws, they can also be used for tasks like removing lids, prying open paint cans, and scraping off old tape or stickers.
Tape Measure
Do you remember the old saying, "Measure twice, cut once"? A tape measure isn't just for avoiding errors when cutting materials. It's also crucial for tasks like gauging the size of furniture you're assembling, figuring out the right height for wall hangings, or checking if a new appliance will fit in your kitchen. Opt for a tape measure that's both sturdy and easy to read.
Hammer
A hammer is a ubiquitous tool that's useful for more than just pounding nails. Need to break something apart, tap pieces into place, or even open a stubborn lid? A sturdy hammer with a comfortable grip will come to your rescue.
Pliers
Pliers come in all shapes and sizes, but for a beginner's toolbox, a set of universal pliers will be most versatile. They're great for holding tiny items, bending wires, or loosening stubborn bolts. Plus, they can come in handy in unexpected ways, like pulling out a broken key from a lock.
Flashlight
A trusty flashlight is one tool that often gets overlooked. But when you're working in a dim area or if you need to shine a light on a hard-to-see place, you'll be glad you stashed one in your toolbox. Consider a hands-free model that can either stand on its own or can be attached to a magnetic surface.
Utility Knife
Last but not least, we have the utility knife. Perfect for tasks such as opening boxes, cutting tape or twine, trimming wallpaper, or scraping off old paint, this is a tool that you'll use over and over again. Look for one with a replaceable blade and a solid grip.
As you can see, with just these six simple tools, you've already got a basic DIY toolbox that will tackle a wide variety of tasks. As you gain experience with your DIY projects, you may find yourself adding more specialized tools. But until then, this is a great place to start. With a basic DIY toolbox, the next DIY task is never too far out of reach!
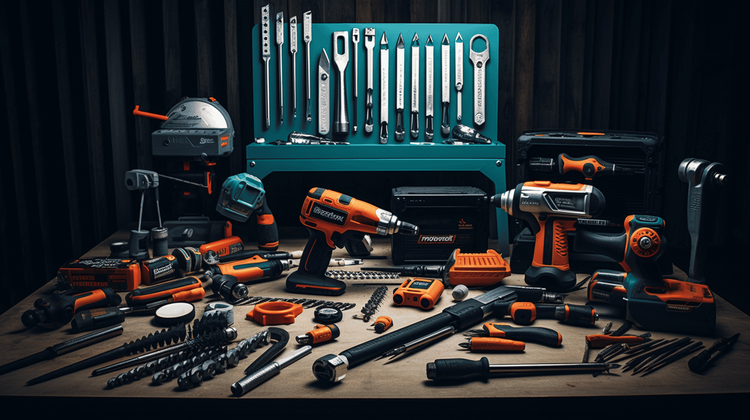
Supplemental Tools for an Advanced DIY Toolbox
The craft of DIY is evolving rapidly, thanks to technological advancements that are arming DIY enthusiasts with highly sophisticated tools for optimal efficiency and precision. Once you're familiar with the basics, it's time to level up and equip your DIY toolbox with some advanced tools. Let's explore some indispensable tools that can transform your DIY experience from novice to pro.
Cordless Drill
Arguably the most versatile member of any power tool ensemble, a cordless drill is an absolute must-have for an advanced DIY toolbox. Freedom of movement, combined with the convenience of interchangeable bits, makes it a super effective tool for drilling holes and driving screws. The selection of a high-rated cordless drill guarantees:
- Daily use without the hassle of entangled cords.
- Ability to carry out impromptu projects.
- Ability to work in confined spaces as well as at various angles.
Remember, you're investing not just in a tool, but in the ease and efficiency of future DIY projects.
Saws
When it comes to cutting materials, a handsaw just won't cut it (pun intended). This is where power saws come into the picture. Broadly, there are two types - circular saws for straight-line cutting and jigsaws for creating curved lines:
- Circular saws: With adjustable settings, they glide through a variety of materials with utter ease.
- Jigsaws: These are the ultimate go-to for intricate works requiring curved cuts.
Switching from a handsaw to a power saw may require a learning curve, but the switch is definitely worth it!
Wood Chisels
Moving on to the finer aspects of DIY, let’s talk about wood chisels. They enable you to carves and shape wood with precision and are highly recommended for projects that require detailed carving or require pieces to join together perfectly. It's worth investing in a set of chisels of various sizes to accommodate different project requirements.
Level
Last, but certainly not least, let’s address the humble yet mighty level. You might think you have a keen eye, but nothing can match the accuracy of a level. It ensures the integrity of your projects by confirming things are perfectly vertical (plumb) or horizontal (level).
Remember the importance of accuracy when it comes to DIY. Even the smallest discrepancy on one end can result from a much larger problem down the line.
Having these tools in your DIY toolbox can significantly enhance your craftsmanship. Remember, you can always start small, learn on the go, and gradually build your advanced toolbox. You're not just creating pieces of utility or art, you're creating memories infused with the joy of crafting.
Use this article as a guide to restructuring and upgrading your toolbox. The value they bring to your projects in terms of accuracy and efficiency will undoubtedly reinforce their worth in your DIY journey. Happy DIY-ing!
Organization and Storage Tips for DIY Toolboxes
Welcome to the ultimate guide to organization and storage tips for DIY toolboxes. This all-inclusive guide has been designed with DIY enthusiasts, handymen, and all other people who regularly use tools in mind. Revel in the relief that comes from finding your tools exactly where you expect them, boosting efficiency and productivity in your DIY projects.
Tool Storage System
The first step to an organized toolbox is the proper selection of your tool storage system. After a thorough review of toolboxes, the DeWalt TSTAK VI wins the heart of DIY enthusiasts for its unique features and convenience. This edition is top tier in versatility and customization, all at a price that won't break the bank. It stands out with its robust and durable design, while maintaining lightweight and easy mobility. So, why does the DeWalt TSTAK VI stand tall among the rest?
- Size and capacity: A good tool storage system should provide adequate space to store all the necessary tools. The DeWalt TSTAK VI doesn't disappoint, offering a large volume capacity which can easily store power tools, hand tools, and accessories.
- Portability: The storage system features strong, tough metal latches and hinges for robustness. If you frequently move from one site to another, this toolbox comes with a bi-material handle on top of each unit for easy and comfortable lifting.
- Organization: The DeWalt TSTAK VI prides itself with its unbeatable organization. It has a fixed divider for organizing drills and bits, plus an organizer top with fixed dividers for small parts – everything in its place, exactly where you expect it.
- Durability: Designed with the tough job site in mind, this toolbox promises resilience and long-lasting service.
Use of Foam Scraps for Divided Spaces
Once you have your toolbox, the second step is to organize your tools within the storage system using foam scraps. Foam offers a cost-effective and adaptable solution for creating divided spaces in your toolbox.
Cutting foam to fit your tools not only keeps them organized and easy to access, but it also protects them from damage. You can cut the foam into shapes that snugly fit each tool, ensuring they stay in place, no matter how much you move your toolbox.
To effectively use foam scraps, follow these simple steps:
- Measure the interior dimensions of your toolbox.
- Cut a sheet of foam to fit these dimensions.
- Arrange your tools on the foam in a way that makes sense to you.
- Trace around each tool with a marker.
- Use a utility knife to cut out the shapes.
- Place your tools in their new foam homes.
In essence, the art of keeping your DIY toolbox organized and maximally useful is in the appropriate choice of a storage system and the smart use of accessories like foam scraps for division and protection of tools. With these organization and storage tips at hand, your DIY projects are set to be more efficient and hassle-free. Enjoy the convenience of an organized toolbox.
The Importance of a Quality Toolbox
There's a certain charm in crafting a DIY project using your own hands, be it repairing a leaky faucet, building an enchanting birdhouse, or redesigning your cozy patio. As enjoyable as it is to see the fruits of your labor, having a quality toolbox on hand to keep your tools organized and secure is equally important. Not only does it safeguard your tools from damage, but also prevents the frustrating mess that often ensues while hunting 'that one screwdriver' in a jumbled heap of tools.
Whether you're a seasoned DIY enthusiast or someone who's just getting their hands dirty, your toolbox is your trusted ally. There's a sense of assurance that comes from knowing that all your essentials are in one place when you need them.
Here's why a quality toolbox is vital:
- Ease of access: Trivial as it may seem, time spent rifling through a pile of tools seeking the one you want could frankly be put to better use. A toolbox that effectively organizes your tools provides quick and easy access, thereby saving your valuable time.
- Protection: Tools are an investment, and like any investment, they require safeguarding to keep working well for a long time. A quality toolbox protects your precious tools against environmental damage, thereby extending their lifespan.
- Portability: With all your tools in one place, a toolbox lets you easily transport your tools anywhere you need, making it immensely convenient for off-site DIY projects.
- Efficiency: Nothing shouts "purposeful" like a well-organized workspace. A well-maintained toolbox can reflect on your work, improving your workflow and, in turn, the quality of your projects.
Before you start your next DIY adventure, remember what our observation yielded - "A quality toolbox is essential for any DIY enthusiast to keep tools organized and secure." Be it a weekend hobby or a serious undertaking, ensuring your toolkit is up to par should top your priority list. Remember, your toolbox is the pillar supporting your DIY dreams. So, go ahead and invest in a resilient toolbox that stands the test of time and lets your DIY spirit soar!
Conclusion
Arming yourself with a well-stocked toolbox is truly a wise investment. Whether simple home repairs, creative projects, or outdoor ventures catch your interest, the satisfaction of completing tasks on your own is unparalleled. Just remember, it's not always about having the most expensive tools, but the most effective ones. Ultra Handy's diverse range of tools cater to both beginner and experienced DIYers, offering quality, durability, and cost-effectiveness, further exhibiting our commitment to assisting you in achieving success in your DIY endeavors. Building your toolbox shouldn't cause a dent in your wallet, rather it should be an enjoyable journey of discovery and development of new skills. As you suit up and step into the world of DIY, remember: Every master was once a beginner. Dive into our Ultra Handy Amazon store to begin your hands-on adventure today.
Frequently Asked Questions
- What are the essential tools to include in a DIY toolbox?Some essential tools to include in a DIY toolbox on a budget are: 1. Hammer, 2. Screwdriver set, 3. Adjustable wrench, 4. Tape measure, and 5. Utility knife.
- Are expensive tools necessary for building a DIY toolbox?Expensive tools are not necessary for building a DIY toolbox. There are many affordable yet reliable options available in the market that can serve your purpose without breaking the bank.
- How can I save money when building my DIY toolbox?To save money when building your DIY toolbox, consider buying tools on sale, purchasing used tools in good condition, borrowing tools from friends or family when needed, and opting for budget-friendly tool brands.
- Should I invest in battery-powered or corded tools?The choice between battery-powered or corded tools depends on your specific needs. Battery-powered tools offer portability and convenience, while corded tools often provide more power. Consider factors such as the type of projects you'll be working on and your budget before making a decision.
- What are some safety precautions to take when using DIY tools?When using DIY tools, it is important to wear appropriate safety gear such as goggles, gloves, and a dust mask. Follow the manufacturer's instructions, keep your work area well-lit and organized, and always unplug power tools when not in use.